Skip to content
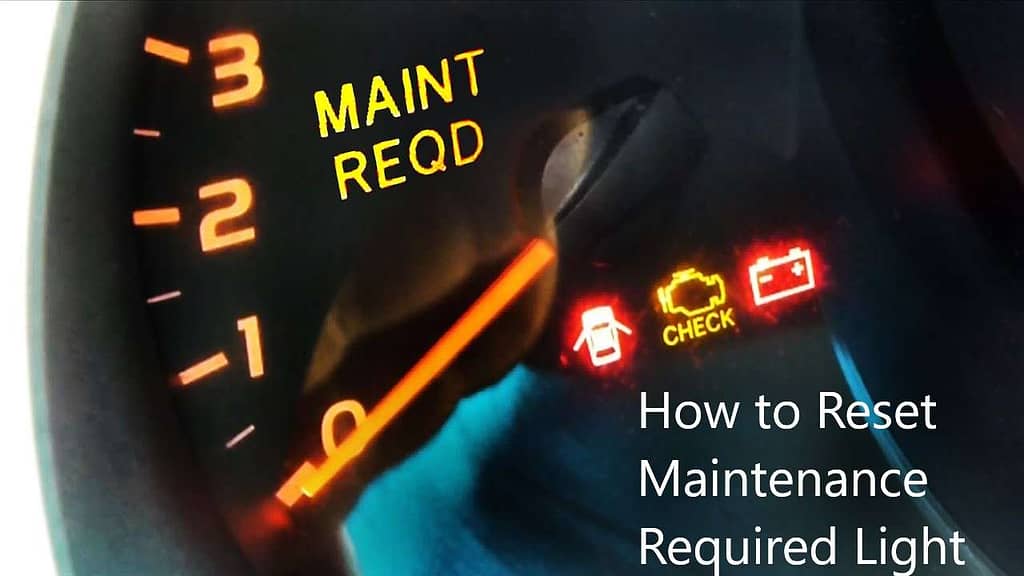
Did you notice any warning light on your car dash to have an engine oil change? Maintaining optimal engine performance and increasing its longevity involves regular car engine oil changes. This article aims to provide you with the necessary information and a step-by-step guide to help you carry out your car engine oil change in Toyota CAMRY, or any other vehicle, even if you haven’t done it before. Let’s get started
The frequency of a car oil change is determined by several factors but most important are age, driving conditions and oil grade. while most auto mechanics suggest you should have an oil change every 3 months or 3,000 miles, most auto manufacturers advise changing engine oil every 5000 to 7,500 miles.
How to Check your Engine oil type
It’s important to identify the ideal oil for your automobile before you start changing the engine oil. To keep the engine healthy and functioning properly, selecting the proper engine oil is crucial. Please always keep this in mind. How then can you accomplish this?
Check Oil Fill Cap
You can check the type of oil to use on the top of the oil fill cap; it is sometimes indicated on it in this form. So you can equally check your oil type on the oil cap and dipstick as well.
Consult your Owner’s Manual
The simplest thing to do is to consult your owner’s manual, which usually specifies the appropriate engine oil for your vehicle and indicates the kind of oil thickness (viscosity) that can be used in different weather conditions.
The oil viscosity and temperature are usually expressed as 0w-20, 0w-30, 5w-20, 5w-30, and 10w-30. What does this mean?
The “0” refers to the thickness (viscosity) of the oil at low temperatures, while the “W” means winter, and the “20” refers to the thickness of the oil at high temperatures. If you are in a low-temperature environment (cold), you may consider choosing 0W-20, 0W-30, or 5W-20. It should be noted that 5W-30 can go for a relative or changing temperature (that is both low and high).
Now, does that mean choosing a car oil type depends on the climate you live in? Yes, but not just the climate but also the vehicle make and model, driving habits, and environment (road), whether it’s a new or old vehicle. However, it is important to consider the guide in the owner’s manual. I hope you find this helpful.
How Often to Change Oil
Now that you know the type of oil to choose for your vehicle, how often should you change your vehicle’s oil?
Some years back, cars required an oil change every 3 months or 3,000 miles. However, modern lubricants allow for oil changes at 5,000–7,500 miles or more.
But you should know that the duration at which your vehicle oil can be changed depends on your driving habits, your vehicle age, make and model, and driving condition (if you frequently drive in stop-and-go traffic, drive in extreme temperatures, or tow heavy loads), etc.
Check the Oil Color Regularly
In addition, regularly check the oil’s color; if the oil is darker or more opaque, it may be time for a change. In addition to color, you should also check the consistency of the oil. Healthy oil should be smooth and viscous.
If the oil is gritty or thick, it may be contaminated with debris or worn-out engine parts. So checking the oil’s color and consistency regularly is essential, not just to know when to change the engine oil but also to detect potential glitches early and take action to prevent serious damage to your engine.
On a conclusive note, to find out what is appropriate for your automobile, it is essential to consult your car’s owner’s handbook for the producer’s advice and also pay attention to any caution provided by the oil life monitoring system.
When to Change Oil in Toyota Camry
Oil Change Interval for Older Camry Car
If your car odometer reads above 100,00 miles, you should consider having an oil change every 3 months. A frequent 3-month interval oil change will help to keep your car in good shape thereby prolonging the engine life span.
Oil Change for a newer Toyota Camry
Most newer Toyota Camry now come with an engine oil monitoring system that alerts you on the dashboard when your car is due for an oil change. In addition, you should follow Toyota’s recommended frequency for oil changes as stated in your manual.
A new Camry with less than 100,000 miles should undergo an oil change at least every 5,000-mile interval.
Tools Required for Oil Change
Changing the oil in your car requires the use of vital tools. In the following sections, I have listed and explained in detail the tools required and the step-by-step process on how to change oil in Toyota Camry or any other vehicle.
- Car Jack
- Wrench. to remove the oil drain plug
- Container. To collect the old oil
- New Oil filter
- New Engine Oil.
- A Set of Rags
5 Steps on How to Change Oil in Toyota Camry
- Step 1: Park the car on a flat surface and jack it up
- Step 2: Open the car oil drain cover and drain out the old oil
- Step 3: Reinstall the oil plug
- Step 4: Install a New Oil Filter and Gasket
- Step 5: Replace with new oil
Step 1: Park the car on a flat surface and jack it up
A car jack is needed to lift the car and access the drain plug underneath the engine and of course to access the filter for some vehicle models that do install it underneath the engine.
You have to understand that filters on an engine may be placed on the front, rear, side, or underneath, depending on the model, as there is no defined location for them. Wheel chocks are also necessary to prevent the car from rolling while being raised. How can you do this?
Park the vehicle on a level surface.
To lift your vehicle safely, locate the jack points situated directly behind the front tires and just in front of the back tires, underneath the rocker panels of the vehicle (see the recommendations in your car’s owner’s manual), and when you have found them, place the jack there.
Make sure the emergency hand brake is engaged to prevent the car from rolling forward or backward.
Now, there are different kinds of car jacks, like floor jacks, bottle jacks, hydraulic jacks, and scissor jacks, among others, but I will be using the scissor jack to explain this process because it is the most common jack people use.
Okay, so place the scissor jack beneath the jack point and turn the jack handle clockwise slowly to lift the car. Use jack stands to support the car once it’s jacked up.
Please never work under a car that’s only supported by a jack. Before you jack up, place wheel chocks around the tires opposite to the ones you’ll be lifting to prevent the car from rolling.
Step 2: Open the Car Oil Drain Cover Under the Engine and drain out the old oil
Before changing a vehicle’s oil; first, start the engine and let it run for 3-5 minutes to warm up the engine, as doing so will make the oil light and enable seamless draining.
Locate the oil drain plug, typically situated as a single nut beneath the oil reservoir in the engine. Proceed to remove this plug using a wrench in order to drain the used oil from the engine.
Utilize a wrench to effectively loosen and detach the plug. To do this, fasten the wrench on the drain bolt and turn anticlockwise to loosen it. When you have loosened it, use your hand to detach the plug from the oil pan. At this point, you may need hand gloves because the engine may be hot. Remember, you warmed it for about five minutes. But in the absence of hand gloves, let the engine cool a bit so you can touch it without harm.
Please note that this wrench has two ends: the box end and the hex driver. The box end, also known as the open end, is used to fit around the oil drain plug for loosening and tightening.
There are various sizes of wrenches available, and the size of the wrench needed for an oil drain plug varies based on the vehicle’s make and model and sometimes the size of the plug itself, which is a long bolt head. It’s important to note that there isn’t a universal oil plug size, but there are a few standard sizes available, including ¼ inch (.6 centimeters), 3/8 inch (.9 centimeters), and ½ inch (1.3 centimeters).
Drain out the Old Oil into a Container
You need to drain out the old oil. But when draining the oil from the vehicle, you need a container to catch and hold the old oil you will be draining from your vehicle. For this, you can use an oil drain or oil drip tray (plastic or metal? No problem); if you don’t have any of these, use anything you have, but just make sure the container is large enough to hold all the oil you’ll be draining.
Position the container directly under the drain plug as you are about to detach it completely so it can catch the used oil immediately before it starts rushing out.
Step 3: Reinstall the Oil Plug
Once the old oil has been fully discharged, it’s time to reinstate the oil plug. This time, put a new washer on the plug and use your hand to twist it clockwise until it hooks, and then fasten the wrench on the drain bolt; turn it clockwise to tighten.
It is essential to use a new washer on the plug. The washer on an oil drain plug is a little flat, circular piece of metal with a hole in the center that resembles a thin disc. It allows the drain plug to pass through. It seals the drain plug and prevents oil from leaking.
A Set of Rags
You need rags to clean up your hands and the oil spills. Your old and unused clothes or a shop towel will all be good for this.
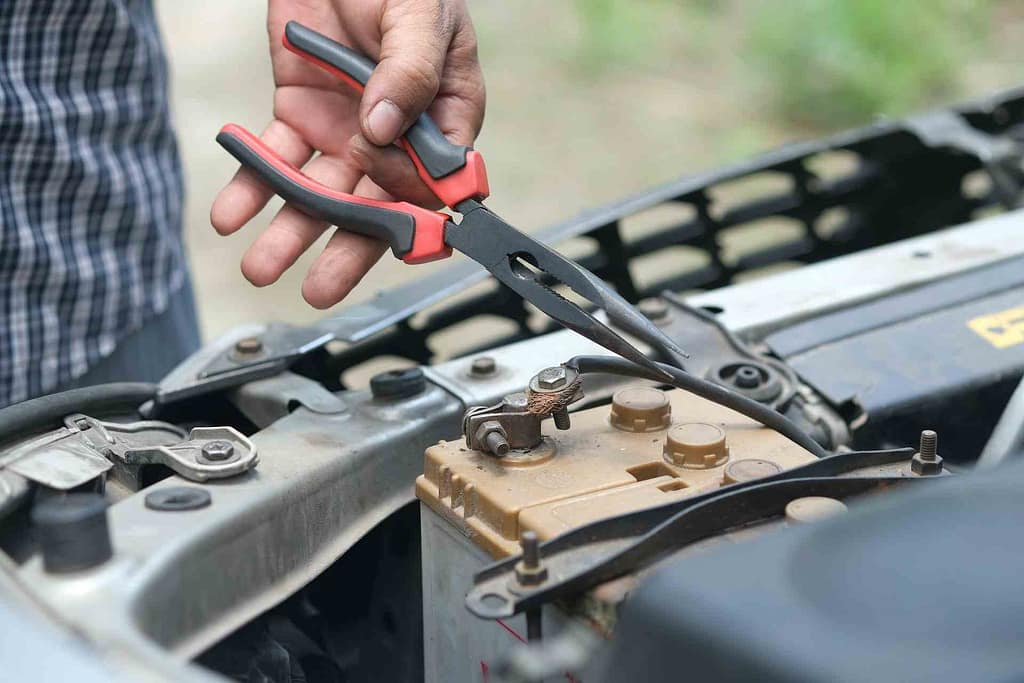
Oil filter plier to remove the oil filter
Oil filter pliers are made to give a secure hold and make it simpler to remove an oil filter from a car without slipping while doing an oil change.
Apart from oil filter pliers, there are several other types of oil filter wrenches available for use, such as the chain-type, which involves wrapping a chain around the spin-on oil filter and then turning the hexagonal bar in an anticlockwise direction to grip and unscrew the filter; the strap-type, which uses a ratchet for turning; and the socket-type oil filter wrench.
This type fits over the end of the filter and is also turned with a ratchet. Etc. But I will use the oil filter plier to explain the process, okay?
So find the oil filter to replace it with a new one. Remember, the oil filter has no set location, so look at the top, bottom, and sides of the engine to find it. Different cars have different locations for the oil filter.
It’s usually coloured black, white or blue looking like a softball-sized cylindrical element situated under the vehicle’s hood (you can reference your car manual to get the exact location of it).
How to use the oil filter plier
After you have found it (the oil filter), to use the oil filter plier:
- First, adjust the joints to fit the size of the filter.
- Position the pliers near the base of the filter for a strong grip, ensuring the teeth of the pliers securely grip the filter.
- Close the pliers around the filter by squeezing the handles, and use the locking feature if available to maintain a secure grip.
- Apply steady pressure and turn the pliers counterclockwise to loosen the filter.
- Keep rotating until the filter is completely loose, and then use your hands to remove it.
- You need to replace it with the new oil filter
- Pour the new oil into the new oil filter as you’re about to install it, and then use your finger to rub it onto the gasket to ensure a good closure.
- To install the new oil filter, use your hand to screw it until it’s too strong for your hand, and then use the oil filter plier. Follow steps one to three. Step four: apply steady pleasure, but this time turn it clockwise to tighten it, and once it’s secure, stop screwing.
Step 4: Install a New Oil Filter and Gasket
Before you install the new oil filter, please note that you will also need to put a new gasket. If you are not familiar with the gasket, it is often on the flat surface of the oil filter that comes into contact with the engine block and is constructed of a particular rubber or plastic substance.
When the oil filter is put on the engine, it is made to produce a tight seal. It assists in keeping the oil’s integrity and preventing leaks. The gasket should always be replaced at the next oil change (or MAINT REQ) or oil filter change, as the case may be because the gasket is not designed to last for a long time.
For vehicles with oil filters underneath the engine, release the car jack and take off the jack stands once the old oil has been drained and the new oil filter has been placed. However, if your car’s oil filter is located on top of the engine, you should let go of the jack as soon as you’ve drained the old oil.
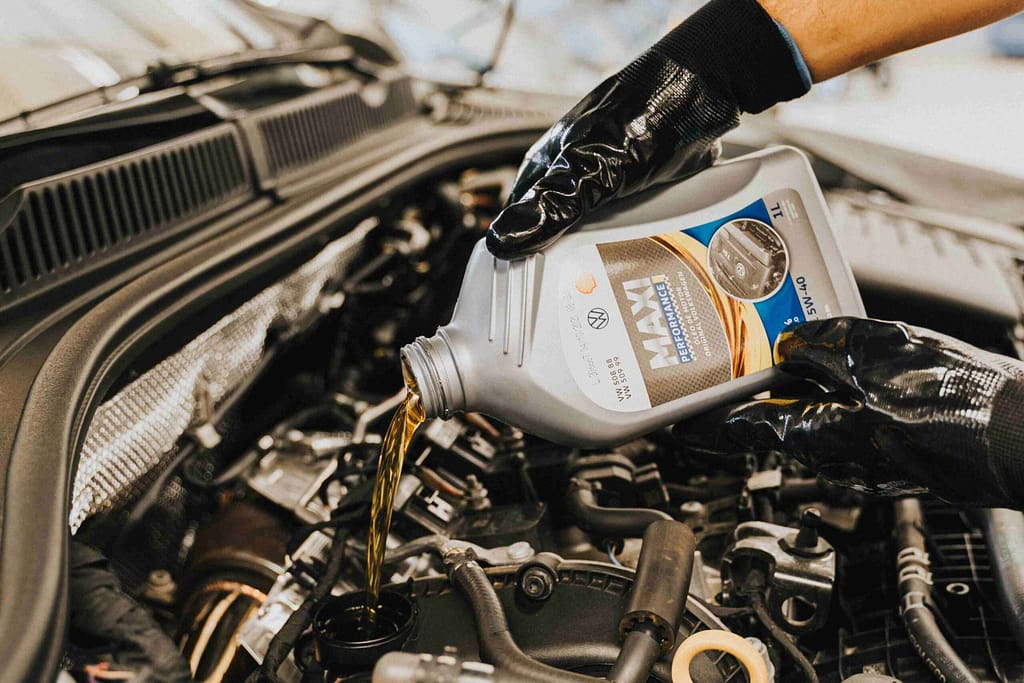
Step 5: Replace with new oil
So after the old oil has been drained and the new oil filter and gasket installed, it is time to pour the new oil.
To do this, open the car hoop. Find the oil fill cap (also known as the oil filler cap). You will pour the fresh motor oil there. The oil filler cap is easy to locate; if you lift the hood, you’ll see it on top of the engine pan or next to a valve cover.
Most times, it is black and generally has an oil emblem, the words “Engine Oil,” or indications of the sort of oil you should use for your car, such as “0w-20.” When you see anything like that, that is the oil fill cap. (You may consider visiting your user manual to identify it easily.)
To open it, use your hand and rotate it counterclockwise; no tool is needed. When adding fresh oil to the engine, ensure that you place the funnel into the oil fill hole first. This simple yet effective tool makes oiling the engine much easier. When changing the oil, using a funnel helps to make the process of refilling the oil organized and efficient.
The quantity of oil to put in a car is determined by the engine size. You can visit your user manual to know the exact quantity of liters to put in, as it varies from vehicle to vehicle.
After you have poured the oil, if there are any spills, you can still use the rag to clear them, and then wait for about five minutes for the oil to resolve.
Check the oil level. To do this, pull out the dipstick from the engine, clean it, put it back, and remove it again. If the oil is in between ‘L” (low) and “H” (high), then you have done a good job, but if it’s low, which is “L,” then you need to add the oil, and of course it shouldn’t be on “H” (high). Being in between low and high is nice.
Congratulations! Start your engine and let it run for about five minutes, you are done! It’s simple, right?
Now that you know how to change oil in Toyota Camry (or whichever vehicle you drive), do not forget to dispose of the old oil safely. Talk to your mechanic or local garage about this.
FAQs
Q: What happens if I fail to change my oil on time?
A: You should be aware that oil that is too old or unclean will not adequately lubricate and safeguard the engine. Therefore, failing to change your engine oil on schedule can result in greater engine wear, poorer engine performance, worse miles per gallon (MPG), and decreased fuel economy, all of which can contribute to engine failure.
Q: Can I switch from conventional to synthetic oil?
A: Yes, without having to go through a particular process, you can go from conventional oil to synthetic oil and back again. When replacing engine oil, follow normal steps and make sure you also replace the oil filter and gasket.
Q: How do I check my oil level?
A: To check your vehicle’s oil level, begin by parking on a flat surface and allowing the engine to cool down. Then, locate the dipstick and remove it. Wipe the dipstick clean and reinsert it fully before pulling it out again. Check the oil level by comparing it to the markings on the dipstick, which usually indicate “L” for low and “H” for high. Some models may use “add” instead of “L” and “max” instead of “H.” The appropriate oil level should fall between “L” and “H”, or closer to “H” depending on the make and model of your vehicle.
Q: Can I use any type of oil in my vehicle?
A: NO! Different engines have specific oil requirements; using the wrong oil type can limit the performance and lifespan of your engine. It is crucial to use the oil type advised in your vehicle’s owner’s handbook.