Skip to content
It may be time to have your ring resized if it is slipping off your finger or preventing you from moving. Of course, you can have a jeweller do it for you, but there are also a few ways you can do it at home on your own, particularly if your ring is not too expensive. We’ll go over a few different methods in this post on how to resize a ring at home to fit your finger precisely.
Guides on How to Resize a Ring at Home
1. Use Silicone to Adjust the Ring Size
Make sure the ring is completely clean. Soak the ring in a dishwashing soap and hot water solution. Another option is to use a specialized jewelry cleaner that is safe for valuable stones and gold. Scrub the metal and any stones set on the ring with a soft toothbrush or the brush included in the package.
Before proceeding, allow the ring to dry completely. Use a softer cloth instead of paper towels, as they can scratch the metal.
It is best to stay away from cleaners that contain bleach, acetone, or chlorine, as they can damage the metal band of a ring.

• Using a coffee stir stick, fill the ring with silicone sealant. Make sure the silicone you use such as food-grade or aquarium silicone is transparent. The bottom of the ring should have the thickest layer applied. Unless the ring is very loose on your finger, use very little silicone.
• Using the coffee stir stick, smooth out the silicone. Since the silicone will be in close contact with your skin, you should make every effort to smooth it out. Smooth out the silicone by running the stick along the inside of the ring.
For cleaning silicone that gets on the outside of the ring, use a wet paper towel.
• Give the silicone time to cure. This can take a day or two, depending on the kind of silicone you use. Avoid wearing your ring during this period, as the silicone will take longer to cure and could come completely loose.
You can just use your fingernail to scratch at the silicone if you need to remove it.
2. Extend the Ring With a Mallet
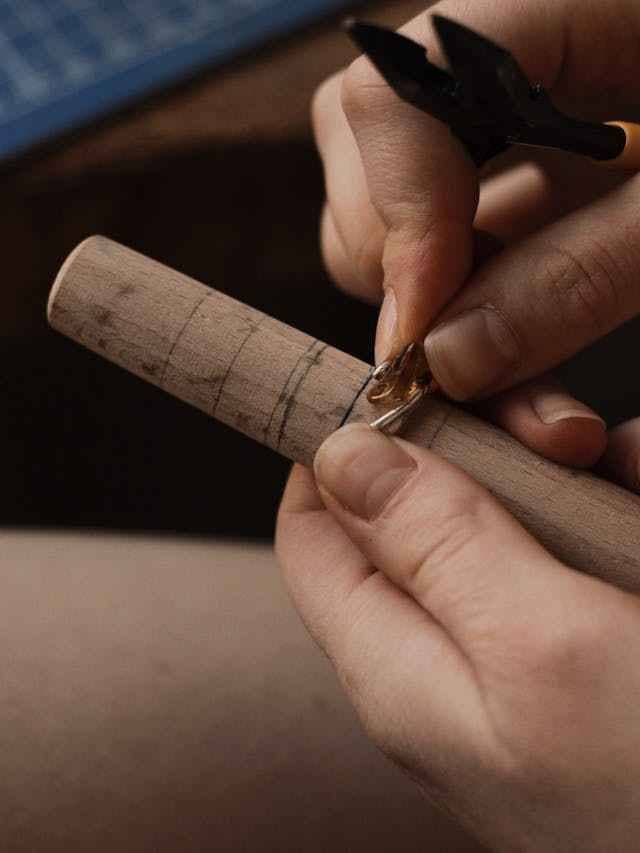
• Use soap to lubricate the ring before placing it on a ring mandrel. Bar soap or dish-washing soap are suitable options. Before slipping the ring onto the mandrel, make sure it is coated evenly.
A graduated metal cone called a ring mandrel is used to measure rings. General online retailers have them easily accessible.
• Using a jeweller’s hammer or wooden mallet, gently tap the ring. You should strike with firmness but gentleness. You’re essentially trying to move the ring down the mandrel when you strike at a downward angle. To stretch the ring equally, be sure to turn it as you strike.
If you are able, secure the mandrel with a vice. This will greatly simplify this step.
To protect the band from harm, place a soft cloth over the ring if all you have access to is a carpenter’s hammer.
3. Resizing a Ring at Home with Plier to Make Ring Smaller
• Mark the middle of the ring’s band. While the ring is on, this will be easier to do. If there are any stones or other markings, make sure they are centered over the top of your finger. Then, under your finger, mark the center of the band with a marker. Choose a hue that will contrast with the ring; black works best with gold and silver.
• Cut the ring along the indicated line with wire cutters. You can use pliers with a cutting edge or specialized wire cutters. Line them up with the drawn line of the ring. Use light pressure to achieve a consistent cut.
• Smooth the edges that were cut. If you don’t have a file made specifically for metal work, make sure the nail file you use is metal. Remove small amounts of metal at a time by filing slowly to make the ring smaller.
• Seal the opening and put on the ring. Position the ring such that its outer curvature runs the length of the open pliers. Squeeze the ring gently to bring the cut ends together. Maintain uniform pressure to ensure that the ring maintains its circular form.
After closing the gap, try on the ring. File the cut ends a little bit more, and try the ring on again if it’s still too loose.
• Tighten up the cut ends of the ring. To smooth out the ends of the ring, use a buffing block, which you can purchase at any beauty supply store. This will prevent your finger from being scraped by the edges.
As an alternative, you can close the ring into a single loop using a propane torch and jeweler’s solder.
4. Remove the ring and try it out without the mandrel
If it’s still too tight, try again with the ring on the mandrel, hammering until it fits. Note that this method is limited to stretching a ring by half a size.
If the ring is stuck, you can loosen it by striking upward with the mallet.
• Mark the band’s center after putting on the ring. It’s okay if the ring now sits above the knuckle; don’t force it on. Mark the center of the ring’s underside with a marker.
• The ring should be cut using a pair of wire cutters along the mark. Either specialized wire cutters or pliers with a cutting edge can be used. Place them in line with the ring’s drawn line. For a consistent cut, apply pressure gently.
• Using the flat nose pliers, carefully bend the ring open. To maintain the ring as even as possible, bend both sides.
• Smooth the sliced edges. The best tool to use is a metalworking file. As an alternative, you can file down the ends with a nail file, but it will take more time. To prevent them from scratching you, make sure the ends are flat.
After filing down the edges, you can use a nail buffer to smooth them out.
• To ensure the fit, try the ring on. The open edges of the ring shouldn’t dig into your finger when you move it; it should fit snugly without moving on your finger.
Remove the ring and use pliers to widen it even more if it’s still too tight.

General Tips for Ring Resize
Be careful when bending the ring because too much force can break it. To give the ring a better shape and reduce the chance of it breaking, try moving the pliers around it rather than just bending each side in one spot.
Warnings
The wearer may get scratches from the ring if the cut edges are not filed properly, especially if they try to take it off.
FAQs
Q: Should My Ring Be Tight?
Your ring may occasionally be a little tight or loose because of the constant changes in the size of your finger. Resizing it to a size where it fits comfortably most of the time should be your aim.
Q: Why should I have the jeweler who made the ring resize it?
Giving it to the jeweller who made it for resizing is a smart idea. They will be aware of the metals the ring is made of and how it was made.
Q: Does my finger’s size change throughout the day?
The size of a finger varies with humidity and temperature. Measure your ring at a temperature that isn’t too high or too low to determine the proper fit. And there aren’t any different reasons why your body is swollen.
CONCLUSION

With a variety of techniques to suit a range of requirements and tastes, the article provides a thorough overview of how to resize a ring at home. Every method is described with precise steps and safety precautions, ranging from applying silicone for a quick fix to using pliers for a longer-term fix.
The addition of advice, cautions, and frequently asked questions (FAQs) improves the reader’s comprehension and guarantees a smooth resizing process. All things considered, this resource offers insightful information and gives people the confidence to confidently customize their jewellery to get the ideal fit.
See more Home DIY post on our Home Page